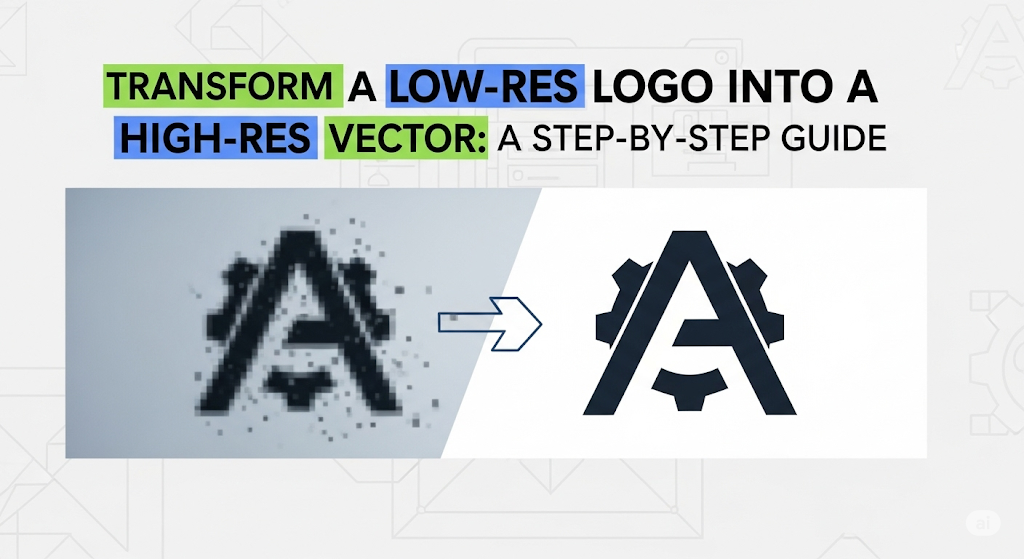
Turning a low-resolution logo into a crisp, high-resolution vector image is crucial for professional branding. This comprehensive guide, inspired by a recent tutorial, walks you through the process using readily available tools like Photoshop. Whether you need your logo for print materials, product mockups, or online use, this method ensures scalability without losing quality.
The Challenge: Low-Resolution Logos and Their Limitations
Many readily available logos, even those downloaded from seemingly reputable sources like Google Images, often suffer from low resolution. This means they appear pixelated when enlarged, unsuitable for high-quality applications. This tutorial tackles this problem head-on, showing you how to upscale a low-resolution logo into a professional, high-resolution vector.
Resources You’ll Need:
Photoshop: (or a similar image editing software) This tutorial uses Photoshop’s features extensively.
High-Resolution Image: A low-resolution image of your logo. The example uses a low-res version of the logo.
Step-by-Step Process: Upscaling Your Logo
- Crop and Prepare: Begin by cropping your logo image to remove any unnecessary background. Use the crop tool in Photoshop to isolate the logo itself.
- Increase Image Size & Resolution: Navigate to Image > Image Size. Increase the dimensions (e.g., to 2000 pixels) and, critically, boost the resolution to at least 300 pixels per inch (ppi). This is essential for print-ready quality. Note that simply enlarging the image will result in blurriness; increasing the resolution is key.
- Preserve Original Color: Before converting to grayscale, use the eyedropper tool to sample the logo’s original color. Add this color to your swatches palette for easy access later. This ensures you can accurately restore the logo’s color after processing.
- Convert to Grayscale: To prepare for the next steps, convert the image to grayscale using Command+Shift+U (Mac) or Ctrl+Shift+U (Windows).
- Add a White Background: Create a new white background layer underneath your logo. This is crucial for the subsequent blurring process.
- Gaussian Blur for Smooth Edges: Convert your logo layer to a Smart Object (Layer > Smart Objects > Convert to Smart Object) to apply non-destructive edits. Then, apply a Gaussian Blur (Filter > Blur > Gaussian Blur). Adjust the radius carefully to smooth the edges without losing detail, aiming for clean lines.
- Curves Adjustment Layer for Color Restoration: Add a Curves adjustment layer. Use the curves to carefully refine the grayscale image, restoring the original color by selectively adjusting the brightness and contrast. You can use the saved color swatch to guide your adjustments.
Key Considerations:
Resolution: The most crucial factor for high-quality images is resolution (measured in pixels per inch or ppi). Aim for at least 300 ppi for print media.
Smart Objects: Using Smart Objects in Photoshop allows you to make non-destructive edits, making it easier to adjust settings without permanently altering your image.
Vector vs. Raster: While this tutorial enhances a raster image (pixels), for ultimate scalability, consider tracing the enhanced image to create a vector logo (using tools like Adobe Illustrator). Vector logos are resolution-independent and can be scaled infinitely without losing quality.
By following these steps, you can successfully transform your low-resolution logo into a high-resolution image suitable for various applications. Remember to always prioritize high resolution for professional results.